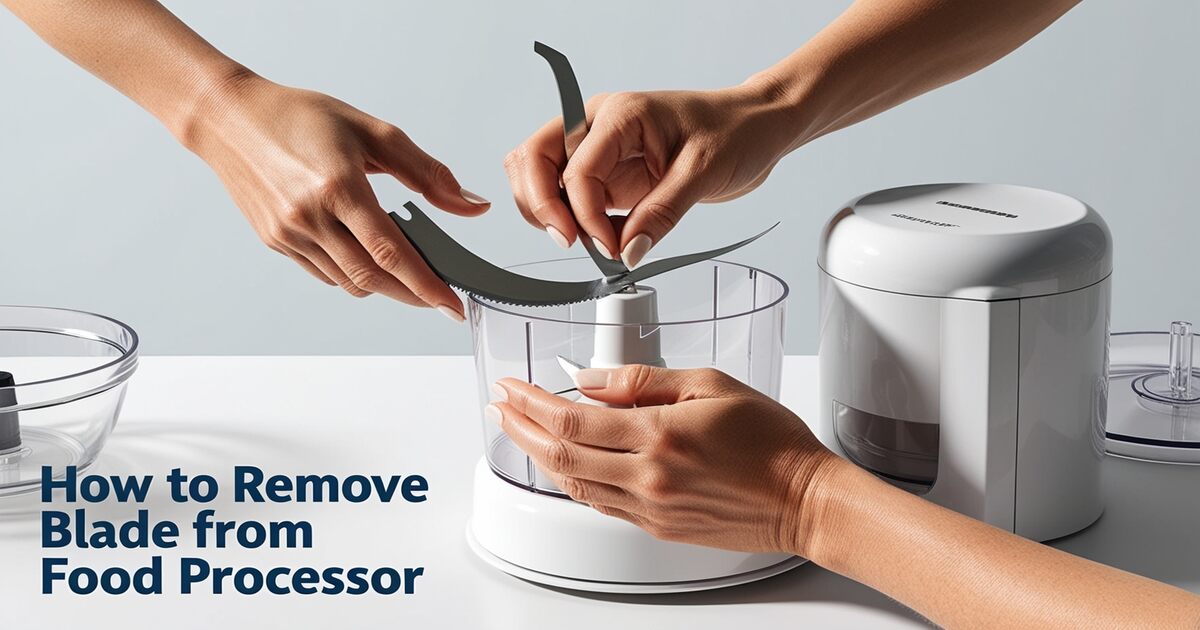
Food processors are a home cook’s best friend—they chop, slice, and shred with precision in seconds. However, learning how to remove blade from food processor is crucial for safe cleaning or swapping it for a different task. Whether you’ve recently purchased one or need a refresher, this guide will walk you through the process safely and effectively while ensuring longevity for one of your favorite kitchen gadgets.
From understanding the blade type to cleaning and maintenance tips, by the end of this blog, you’ll be a pro at handling your food processor’s blade like a seasoned chef.
Why Safe Blade Removal Matters
Food processors are incredibly versatile, but their powerful blades need careful handling to prevent accidents. Improper removal can lead to safety hazards or damage to your appliance. A little time invested in learning to handle the blades properly will keep you safe and protect your kitchen appliance so it can assist you in creating countless culinary masterpieces.
Below, we’ll address everything you need to know, step-by-step—from preparation to cleaning and troubleshooting.
Safety First Around Sharp Blades
Before you touch the blade, focus on safety. Neglecting proper safety precautions can turn a simple task into an unfortunate accident.
Key Safety Tips:
- Unplug the Food Processor: Always unplug the device from the power source before working with any internal parts to avoid accidental activation.
- Use Protective Gear: Consider wearing cut-resistant gloves while handling sharp blades. These can add an extra layer of protection.
- Handle with Care: Always grip the blade by the central plastic core or hub, not the sharp edges.
By keeping these precautions front and center, you can handle blades worry-free.
Know Your Blade Type Before Learning How to Remove Blade from Food Processor
Not all blades are created equal. Food processors often have various blades tailored for specific tasks like slicing, shredding, or dicing.
Blade Types to Identify:
- S-Shaped Blades: Commonly used for chopping and blending. They are often the hardest to dislodge due to their tight fit.
- Disk Blades: These flat, round blades are typically used for slicing or grating and are often much easier to remove.
- Specialty Attachments: Dough blades or julienne attachments may have unique mechanisms that differ from standard blades.
How to Check for Your Blade’s Characteristics:
- Consult your food processor manual.
- Look for product-specific indicators or online guides.
- Check the attachment mechanism on your model.
Knowing your blade’s type ensures you’re prepared for its specific removal process.
Preparing Before Removing the Blade
Preparation is the secret to a smooth removal process. Brush up on these steps before you get started.
- Clean the Food Processor After Use: If your processor has scraps or liquid in it, carefully wipe down any excess with a damp cloth first.
- Cool it Down: If you’ve just used your processor for warm ingredients, ensure the unit and blade have cooled to prevent burns.
- Gather Your Tools: Some blades require specific tools for removal. A soft cloth and gloves can also help protect your hands.
Setting yourself up properly will make the removal process seamless.
Step-by-Step Guide to Removing the Blade
Follow these steps to safely remove your food processor blade without damaging your appliance or putting yourself at risk.
- Unplug the Appliance: This is non-negotiable for safety.
- Unlock the Processor Bowl: Depending on your model, twist or unclip the bowl to access the blade.
- Stabilize the Bowl: Place it on a flat, stable surface so it doesn’t wobble while you work.
- Remove the Blade: Grasp the plastic hub (not the sharp edge) and gently pull upward. If it sticks, wiggle it slightly while applying consistent pressure.
Pro Tip: Keep your grip firm but gentle—too much force can cause the blade or the hub to crack.
Common Mistakes to Avoid:
- Forcing the blade out at an angle.
- Need to stabilize the base of the processor bowl.
- Gripping the blade’s edges directly.
Cleaning the Blade after Removal
Once the blade is off, it’s time to clean it properly.
- Rinse Immediately: Avoid letting food dry on the blade, as it makes cleanup harder.
- Handwash When Possible: Opt for warm water, mild detergent, and a soft sponge.
- Dry Thoroughly: Use a clean towel to prevent rust or residue from building up.
Avoid abrasive scrubbers that can dull the blade over time.
Reinserting the Blade
Reassembling your food processor after cleaning is as important as removing the blade.
- Line up the blade with the central shaft.
- Secure it in place by pressing down gently.
- Listen for a click or ensure it feels firmly secure.
Finally, give the processor a quick test (while empty) to ensure everything is correctly set up.
Troubleshooting Blade Issues
If removing the blade isn’t going as planned, don’t panic!
Common Problems & Solutions:
- Blade Stuck in Place: Ensure there’s no leftover food debris causing friction. A gentle wiggle should help loosen it.
- Blade Doesn’t Reattach Properly: Double-check that the shaft and attachment points are aligned.
- Grinding or Resistance: This could be a sign of wear; consult the manufacturer.
If in doubt, contacting customer service or a qualified technician is your safest bet.
Blade Maintenance Tips
To keep your food processor blade in tip-top shape for years to come, follow these maintenance tips:
- Sharpen Blades When Needed: If your blade struggles to chop effectively, it may need sharpening.
- Inspect for Damage: Regularly check for signs of wear, such as chipping or dullness.
- Store Safely: Keep the blade in a protective cover or designated storage space when not in use.
A well-maintained blade performs better and lasts longer, saving you money in the long run.
Frequently Asked Questions
Can I wash my blade in the dishwasher?
Though many blades are labeled “dishwasher safe,” handwashing is gentler and helps maintain sharpness.
What if my blade feels dull?
You can sharpen stainless steel blades using a specialized tool or take them to a professional sharpening service.
Is it normal for blades to become more challenging to remove over time?
Yes, wear and tear can make removal trickier. Keeping the attachment points clean and lubricated can help.
How often should I replace my blade?
This depends on usage, but every 6–12 months is typical for heavy use. Look for signs of dullness or damage.
Bring it All Together.
Removing a food processor blade might seem daunting at first, but learning how to remove blade from food processor properly is simpler than you think! From unplugging to cleaning and reassembling, each stage ensures safety and efficiency in your kitchen.
For those aiming to get the most out of their appliances, investing a little time in proper maintenance can extend its lifespan and keep your meals tasting their best.
Keep slicing, dicing, and blending with confidence. A little care goes a long way toward making the most of your trusty food processor!


